
Moving your server to the cloud can feel like a massive technical jump, but it’s probably more straightforward than you think. This guide is written for Australian businesses, schools, and sole traders who need a rock-solid server without the hassle and expense of physical hardware. We’ll walk you through setting up a Windows Server on Azure from start to finish, all in plain English.
TL;DR
This guide provides a step-by-step walkthrough for setting up a Windows Server in Microsoft Azure. It covers crucial planning stages like choosing the right virtual machine size and storage, the technical setup process including networking and security, and essential post-deployment tasks like patching and backups. The goal is to demystify the process, helping you build a secure and cost-effective cloud server. It emphasizes that while the setup is manageable, professional help is recommended for complex configurations to avoid common pitfalls.
Why Move Your Windows Server to the Azure Cloud?
Thinking about finally ditching that old physical server in the corner? For a lot of Australian businesses, moving to a Windows Server on Microsoft Azure is the most sensible way to get enterprise-grade IT without buying and maintaining all the hardware yourself. It puts you in the driver’s seat of a modern, flexible, and secure server environment.

From Physical Hardware to Cloud Flexibility
The idea is simple: instead of a noisy, power-hungry box humming away in your office, your server runs in one of Microsoft’s highly secure data centres. This shift brings some immediate and powerful advantages:
- Slash Upfront Costs: You get to skip the huge capital outlay that comes with buying a new physical server.
- Scale on Demand: Need more grunt for a busy period? You can boost your server’s resources with just a few clicks. Business slowing down? Scale it back.
- Work From Anywhere: Your team can securely access the server from anywhere with an internet connection—perfect for the reality of remote and hybrid work.
This guide will demystify the process, showing you exactly what’s needed before you even start. Understanding the benefits of Azure is a great first step, and we’ve detailed more in our article on the http://tbourke-solutions.com.au/benefits-of-azure-cloud-for-small-business/.
Why Azure Is a Mature and Reliable Choice
Microsoft Azure first appeared back in October 2008 and launched commercially as Windows Azure in February 2010, before getting its current name in 2014. That timeline matters. It means the platform has had well over a decade to grow, mature, and iron out the kinks.
For Australian organisations, this means the setup process has become highly standardised and reliable. It’s less of a tech gamble and more of a smart business decision that cuts upfront spending, gets you up and running faster, and makes supporting staff across different locations a whole lot simpler.
Your Quick Answer Guide
So, what does setting up a Windows Server on Azure actually involve? Think of it as building a powerful, new server for your business, but instead of buying a physical box, you’re renting a secure, virtual one from Microsoft’s cloud. You’ll get to pick its size, the operating system it runs, and even its physical location, like the Australia East region. The core setup involves configuring its network security to control who gets in, creating your administrator account, and then connecting to it remotely to install your business software.
The big win here is that you sidestep the hefty upfront cost of buying a physical server and only pay for the resources you actually use. This gives you access to enterprise-grade tools for backup and security that would be incredibly expensive to build yourself. It’s the perfect solution for businesses that need reliable, scalable power for their applications, file sharing, or remote team access.
If you’re still weighing up the pros and cons, our detailed guide on Azure vs On-Premise for Australian businesses is a must-read. It breaks down the financial and operational differences, helping you make sure a cloud server is the right move before you start.
Planning Your Azure Server Deployment
Before you even think about clicking a single button inside the Azure portal, it pays to do a bit of planning. Trust me, a little forethought now will save you a heap of time and, more importantly, money down the track. This is your business-focused checklist for making the right calls before any of the technical work kicks off.
Thinking about how to set up a Windows Server on Azure is much simpler these days. The platform has come a long way since Microsoft first announced it back on October 28, 2008, before its commercial launch in 2010. By 2014, it was rebranded as Microsoft Azure, and that long history means today’s setup process is fairly standardised around a few key decisions: location, size, operating system, storage, and firewall rules. You can get the full story from this history of Microsoft Azure article.
Match the Server to the Job
The very first question you need to ask is: what will this server actually do? The answer directly shapes the Virtual Machine (VM) size you’ll need, which is the biggest factor in your ongoing costs.
- Simple File Share: If you just need a central spot to store and share files, you can often get away with a smaller, general-purpose VM.
- Database Host: Running something like SQL Server? That needs plenty of memory and fast storage to keep things running smoothly. You’d be looking at a memory-optimised VM.
- Remote Desktop Host: If your team needs to connect in remotely to use applications, you’ll want a VM with more CPU cores to handle all those simultaneous user sessions without grinding to a halt.
To help you visualise this, think of it like choosing a work vehicle. You wouldn’t use a small hatchback to haul heavy equipment, and you wouldn’t use a giant truck for a simple delivery. The same logic applies to your server.
Choosing Your Windows Server VM Size
Deciding on the right VM “series” can feel like reading alphabet soup. This table breaks down the most common choices to help you match the server to your business needs in plain English.
| VM Series | Best For | Plain English Example |
|---|---|---|
| B-series | Low-traffic web servers, development, testing | A small business website that doesn’t get thousands of visitors, or a test environment. |
| D-series | General business applications, small databases | The workhorse. Perfect for running your main line-of-business app or a standard file server. |
| E-series | Large databases, data analytics | Your company’s primary database server holding customer records or running analytics reports. |
| NV-series | Remote desktops, virtualised applications | A server that multiple staff members will remote into at once to run software like MYOB or Xero. |
The goal is to find that sweet spot between performance and cost. Over-spec your server, and you’re just burning cash. Under-spec it, and you’ll have performance headaches and frustrated staff.
Choosing the right size is a balancing act. Starting too small leads to poor performance, but over-provisioning wastes money. The beauty of Azure is that you can resize your VM later if your needs change.
Storage and Location Decisions
Next up is storage. Azure gives you a few options, but for most businesses, the choice is between Standard SSDs and Premium SSDs. For any serious business application—your accounting software, your database, your main file server—Premium SSDs are the only way to go. They deliver the performance and reliability you need. Standard is perfectly fine for less critical workloads or storing backups.
Finally, where your server “lives” is a crucial decision. You should always choose an Australian Azure region, like Australia East (Sydney) or Australia Southeast (Melbourne). This keeps your data located within Australia, which is vital for meeting data sovereignty laws and gives your local users the fastest, most responsive connection.
If you’re looking to move an existing server into Azure rather than starting from scratch, our Azure migration guide has a heap of extra tips for planning that switch.
Alright, with the groundwork laid, it’s time to roll up our sleeves and actually build the server. This is the fun part, where the decisions we’ve just made get turned into a real, working machine inside the Azure portal. We’ll be creating the Virtual Machine (VM) itself, sorting out its network, and locking down the initial access.
When you kick off the VM creation process in Azure, the portal guides you through a series of tabs. The first one, Basics, is where you’ll give your server a name, pick the Australian region we settled on, and choose the Windows Server 2022 Datacenter Azure Edition image. This is also where you’ll create your first administrator account and, crucially, set a very strong password.
Nailing the Networking and Security First
I can’t stress this enough: the Networking tab is the most critical piece of this whole puzzle. It’s where you define your Virtual Network (VNet), its subnet, and, most importantly, the Network Security Group (NSG). Think of the NSG as the digital bouncer for your server; it’s the firewall that decides precisely what traffic is allowed in and what gets blocked at the door.
By default, Azure will kindly offer to create an NSG that opens up Remote Desktop Protocol (RDP) to the internet. While this is necessary for you to connect and manage the server initially, leaving it wide open is a massive security risk.
For the initial setup, you’ll need that RDP access. But the very first thing you should do after connecting is lock it down to your specific office or home IP address. Never, ever leave RDP open to the entire internet.
This infographic sums up the key decisions that should have led you to this build stage.
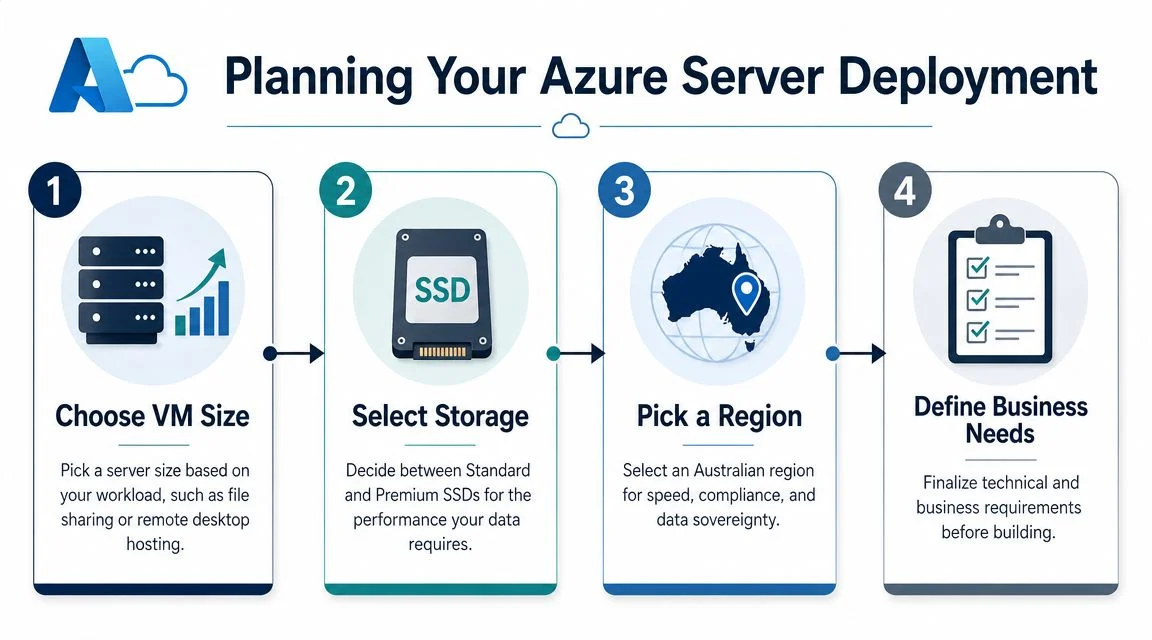
Getting this process right ensures you have all your requirements sorted before you start seeing charges on your bill.
Launching and Connecting to Your New Server
Once you’ve gone through the basics and networking tabs and confirmed your VM size and storage options, you can hit the “Review + create” button. Azure will run a quick validation check on your settings and then start provisioning your server. This whole process usually just takes a few minutes.
After it’s deployed, your shiny new VM will have a public IP address. Now, you just need to fire up the Remote Desktop Connection app on your own computer, punch in that IP address, and log in with the administrator username and password you created earlier.
Congratulations, your server is officially live and running in the cloud! To understand how this single server fits into a bigger picture, you can explore our infrastructure and cloud services.
When to Get Help
This guide can get you a long way, but there comes a point where following instructions feels a bit like you’re in over your head. Knowing when to pause and call in an expert isn’t a sign of failure—it’s a smart business decision.
Getting the networking wrong is a classic example. A misconfigured firewall or a poorly planned virtual network can be like leaving the digital back door wide open, especially if you’re trying to link your new cloud server to your office network or handle sensitive data. The same goes for more complex jobs like integrating Active Directory or setting up a bulletproof backup and disaster recovery plan. The cost of a simple mistake here can be huge.
If you feel that knot in your stomach telling you you’re out of your depth, it’s time to listen. Bringing in an expert prevents those costly errors and ensures your server is secure, reliable, and efficient from day one.
At Tbourke Solutions, we handle these technical setups every single day. If you want to have a no-obligation chat about your project, please get in touch via our contact page.
Essential Post-Setup Security and Maintenance
So, your new Windows Server is live in Azure. Great! But don’t pop the champagne just yet. The job isn’t quite finished. Getting the server running is like getting the keys to a new office; you still need to change the locks, set the alarm, and make sure it’s a safe place to work. These next steps are what turn a basic virtual machine into a hardened, reliable business asset.
The very first thing on your list should be security hardening. As soon as you connect to your server for the first time, your immediate task is to run Windows Update. Applying all the latest security patches is your absolute first line of defence, closing off the known vulnerabilities that attackers love to exploit. For a proper breakdown of this, our Windows patch management guide covers everything you need to know.
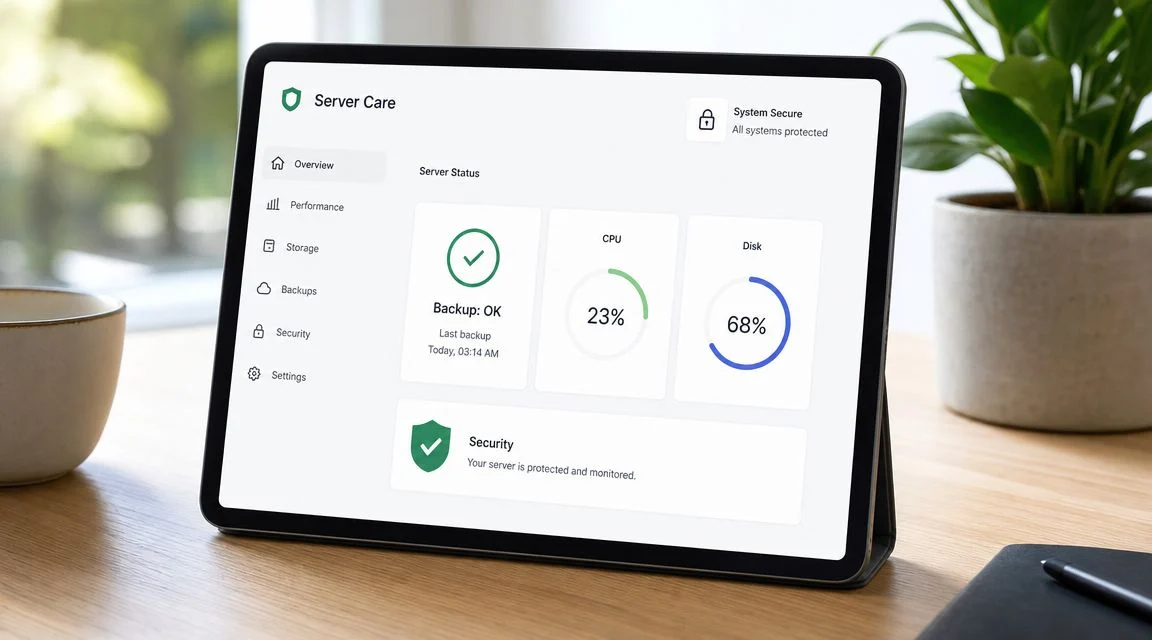
From there, you’ll want to configure the local Windows Firewall. Think of it this way: your Azure Network Security Group (NSG) is like the main gate for your property, controlling what comes in and out. The local firewall is the lock on the server’s own front door, giving you precise control over what software can communicate from inside the machine itself.
Setting Up Backups and Monitoring
Once the locks are in place, it’s time to think about your safety net: data protection. Azure Backup is a surprisingly straightforward and powerful tool for this. With just a few clicks, you can set up fully automated backups of your entire server, ensuring you can get back on your feet quickly if disaster strikes.
When setting this up, you need to consider two key ideas:
- Recovery Point Objective (RPO): This is about data loss. How much data can you afford to lose in a worst-case scenario? An hour? A day? Your answer determines how often your backups should run.
- Recovery Time Objective (RTO): This is about downtime. How quickly do you need to be back up and running? Azure Backup allows for very fast restores, helping you minimise business interruption.
Finally, you need to keep a close eye on your server’s health and performance. This is where Azure Monitor comes in. It helps you track vital signs like CPU usage and how much disk space is left. More importantly, it can send you alerts before a small issue spirals into a major problem, like your server grinding to a halt because it ran out of storage.
For auditing and accountability, it’s also good to know that Azure activity logs keep track of all external changes to your VM—things like reboots or disk modifications—for around 90 days. Meanwhile, everything happening inside the server is logged in the Windows Event Viewer. This double-layered logging is fantastic for accountability and troubleshooting, a feature we find particularly useful for our Australian SME and school clients. As you can discover in this detailed video, this kind of setup makes security documentation and compliance much simpler.
Common Questions About Windows Server on Azure
Moving a server to the cloud naturally brings up a lot of questions. To help clear things up, we’ve put together some straightforward answers to the queries we hear most often from our clients, covering everything from cost to security.
How much does it cost to run a Windows Server on Azure?
This is always the first question, and the honest answer is: it depends. The final cost is determined by the server’s size (CPU and RAM), the type of storage you select (Premium SSD is recommended for performance), and how many hours it runs. A small server for basic testing might only cost a few dollars a day, while a powerful application server will be significantly more. Azure works on a pay-as-you-go model, but for production servers that are always on, you can achieve significant savings, often over 50%, by committing to a 1 or 3-year Reserved Instance.
The best way to avoid bill shock is to use the official Azure Pricing Calculator. It lets you configure your exact server specifications and see a projected monthly cost before you commit to anything.
Do I need a special licence for Windows Server in Azure?
You have two main options. The easiest is to use the “pay-as-you-go” licence included in the virtual machine’s hourly cost. This is simple and requires no extra management. Alternatively, if your business already has Windows Server licences with active Software Assurance, you can use the Azure Hybrid Benefit. This allows you to “bring your own licence” to Azure, which can lead to substantial cost savings on the VM price.
Is a server in Azure more secure than an on-premise server?
It certainly can be, but security is a shared responsibility. Microsoft secures the physical data centres and the underlying cloud infrastructure. However, you are responsible for securing the virtual machine itself. This includes configuring the Windows operating system securely, applying patches promptly using Windows Update, correctly setting up firewall rules in the Network Security Group (NSG), and managing user access. Azure provides powerful security tools like Microsoft Defender for Cloud and Azure Backup, but they are only effective if configured and managed correctly. An improperly configured cloud server can be a major security risk.
How Tbourke Solutions Can Help
Feeling like you’ve just read a university textbook on cloud infrastructure? You’re not alone. This guide covers a lot of ground, and it’s easy to feel overwhelmed, especially when you just want to get your Azure setup done right the first time.
At Tbourke Solutions, we specialise in taking the complexity out of cloud projects for small and medium businesses. With over 20 years of hands-on IT experience, we’ve seen how a well-planned Azure environment can transform a business and how a poorly planned one can become a costly headache. We are here to take the guesswork out of the entire process.
We offer several options to assist you:
- Consultation and Planning: We can help you map out the perfect solution that aligns with your business goals and respects your budget.
- Full Implementation: We can handle the entire setup and migration of your critical data, ensuring a seamless transition to the cloud.
- Managed Services: We provide ongoing management to ensure your servers stay secure, patched, backed up, and running smoothly, freeing you to focus on your business.
Our entire focus is on making this powerful technology work for you, not the other way around. Let us build a clear, transparent plan for your Azure project. We’re experts at translating technical jargon into real business outcomes, ensuring your cloud investment pays off from day one.
If you’d like to discuss your specific needs and get some expert guidance, please reach out to Tbourke Solutions by submitting a query on our contact page. We look forward to helping you succeed.
Share This Story, Choose Your Platform!